
How Can We Help?
Important: An Onboard Recording Schedule must be created for the camera in order for it to start recording.
Onboard Recording Features
| Multiple viewing options | View recorded video on the local network (i.e., the same network as the camera) or remotely using a computer, smartphone, or tablet. |
| Activity timeline | System events, such as Video Analytic-triggered clips, are noted in the playback timeline on the Customer Website. |
| Rolling recordings | The oldest video content on the card is automatically deleted to make room for new recordings. |
| Data encryption | Recorded video is encrypted and can only be viewed when the SD card is in the camera that recorded the video. When a brand new Onboard Recording rule is created for a camera, the camera formats the micro SD card. This deletes all data stored on the card including any video recordings from a camera that may have been previously used with the card. |
| Localized recordings | Each micro SD card records the video footage from the camera it is inserted into. The card can be removed from a camera and placed back in that same camera at a later date. The original data will be retained until the card is full and the oldest data is deleted to make room for the new recordings provided the card does not have data from other devices after being removed from the camera. |
Configure Onboard Recording
Install the SD card in the camera
Create the recording rule
- Verify that the micro SD card is inserted into the camera.
- Log into the Customer Website.
- Click Video.
- Click Recording Rules.
- Click Local Recordings.
- Click + Add New Schedule.
- Using the Select a camera to record from dropdown menu, select the desired device.
- Using the Select recording quality slider, select the desired quality.
- In Schedule recording time, click to select either At all times or Only during the following times.
- If Only during the follow timesis selected:
- Click to select the desired days to record.
- Using the Starting at and Ending at dropdown menus, select the period to record in hours.
- If Only during the follow timesis selected:
- To limit the number of days that recordings are kept:
- Click the Limit the number of days to record toggle switch to enable a limit.
- Using the dropdown menu, select the desired number of days to limit the recordings to.
- Click Save.
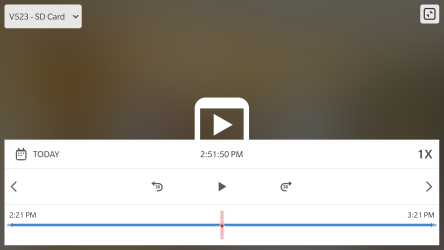
View SD card recorded video
For a detailed list of all available Smart View features, see View onboard recordings from a camera using Smart View.
To view Smart View using the Customer Website:

- Log into the Customer Website.
- Click Video.
- Click Onboard Timeline.
- Using the video device dropdown menu, select the desired device to play back.
- Click
 to stream the device’s recorded video.
To view Smart View using the Customer app:
- Log into the Customer app.
- Tap
 .
. - Tap Video.
- Tap 24/7.
- Tap
 .
.